Helium
The integration with Helium allows the Cloud Studio IoT Platform to communicate with LoRaWAN devices using a variety of device models available on the market. This article describes the steps necessary to complete the integration.
Requirements
Prior to integration, the user must have:
- An instance identifier. Depending on your Gear Studio subscription, the most common instance names are:
- gear.cloud.studio. This instance name corresponds to a common Gear Studio instance, including the free version.
- xxxx.cloud.studio. This instance name corresponds to Flex instances where hosting is provided by Cloud Studio, but the client can choose the subdomain used (xxxx).
- Other. For Enterprise clients using their own domain, the chosen domain name should be used.
- An Access Token. Data sent from Helium Console will use this access token to access the platform, and therefore Helium will have the permissions associated with this access token. It is recommended to create a new access token specifically for the Helium integration to simplify security control.
Creating a Connection with UI
Log in to console.helium.com. Then follow these steps:
- Click on Integrations -> Add New Integration -> HTTP**.**
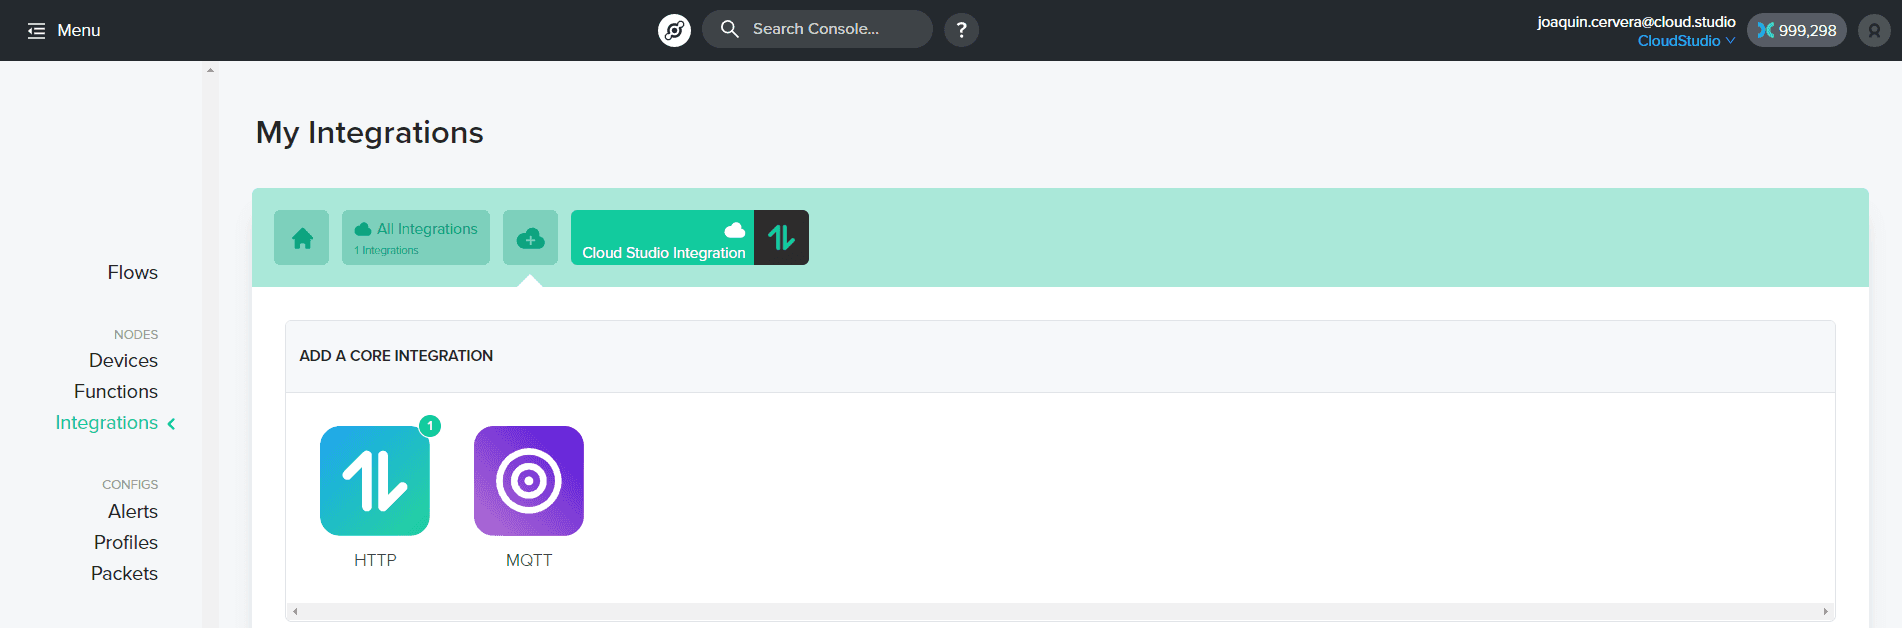
- A new page will open. You will need to update the information within the section: "Update your connection details".
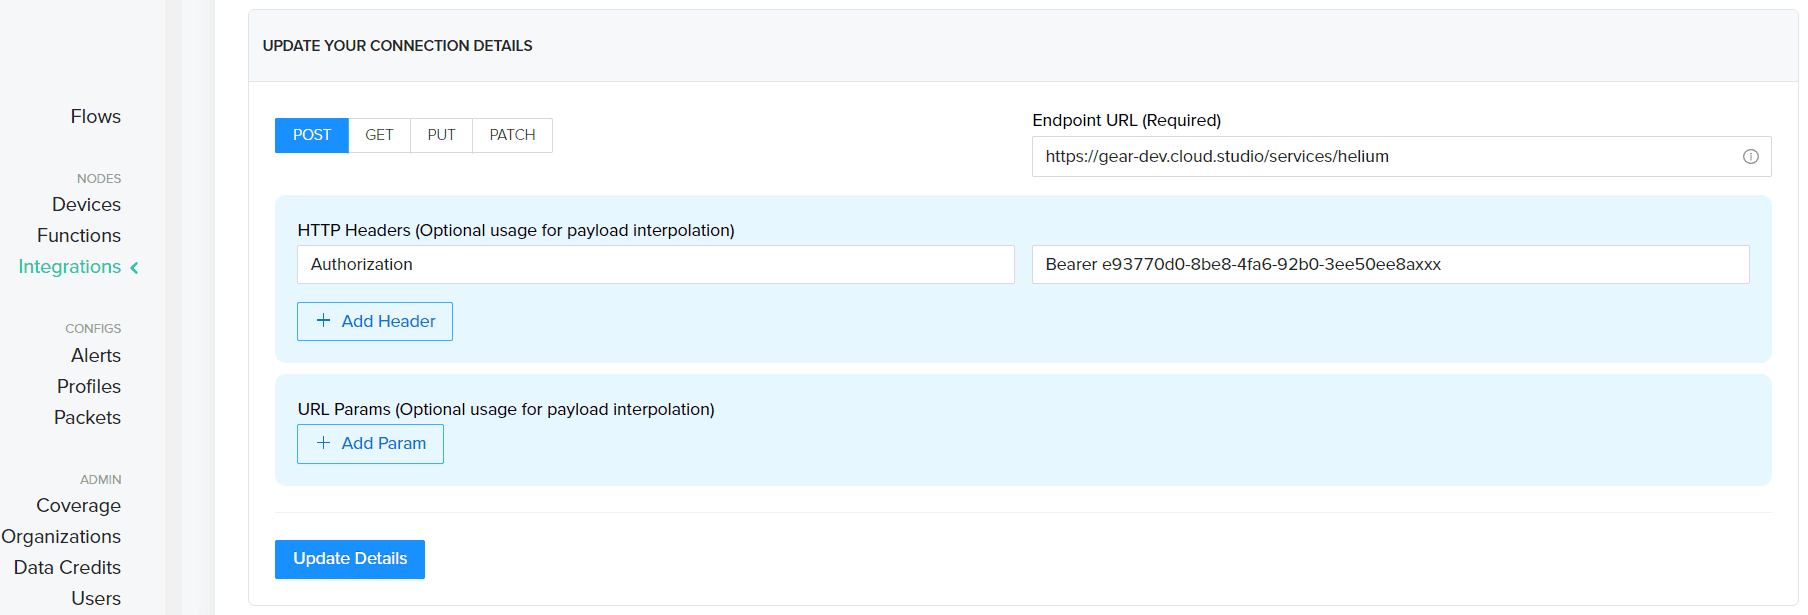
The fields to update are:
- Endpoint URL (Required): Must be filled with the instance URL followed by "/service/helium". For example, when using the general Gear.cloud.studio instance, the URL to enter would be https://gear.cloud.studio/services/helium.
- HTTP Headers (Optional usage for payload interpolation): The "Key" variable must be filled with the word "Authorization" and the "Value" variable must be filled with the word "Bearer" followed by the previously generated access token, separated by a space.
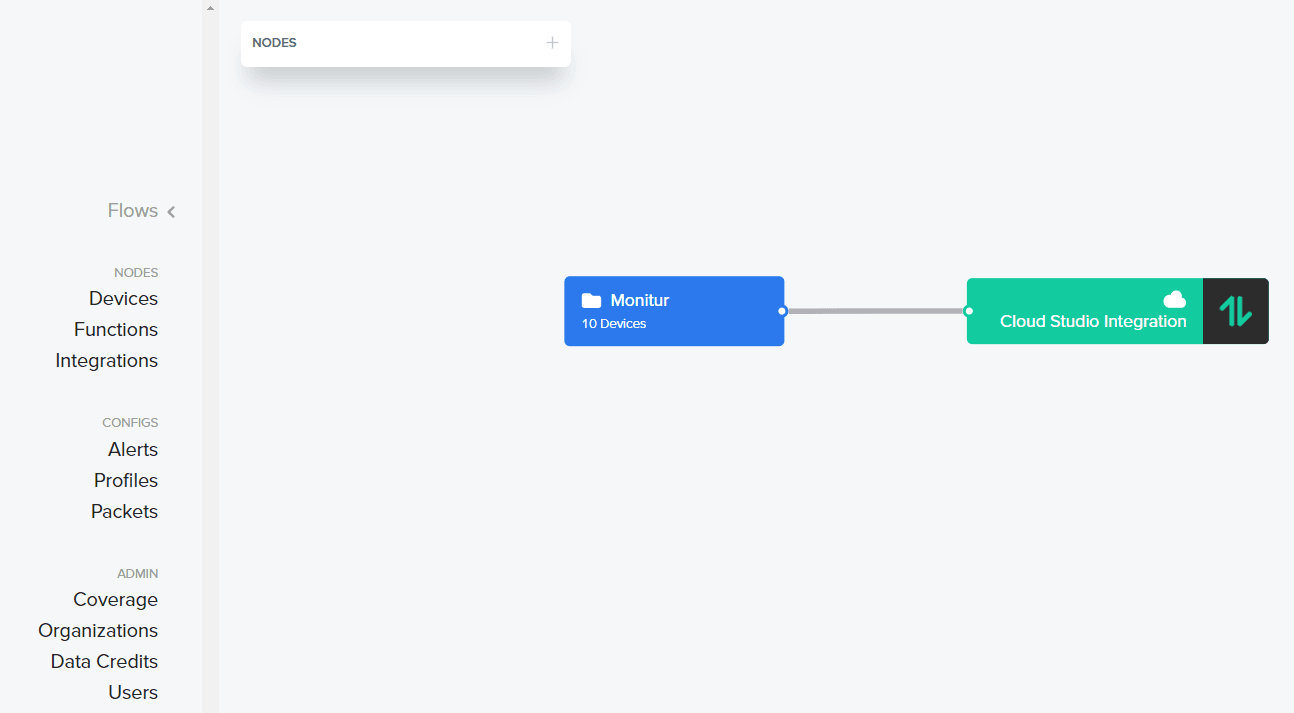
Finally, add the selected name for the integration and click "Add the integration".
- Within the main menu, go to the Flow option, add the devices (previously connected), add the integration created in the previous step, and then connect both nodes.
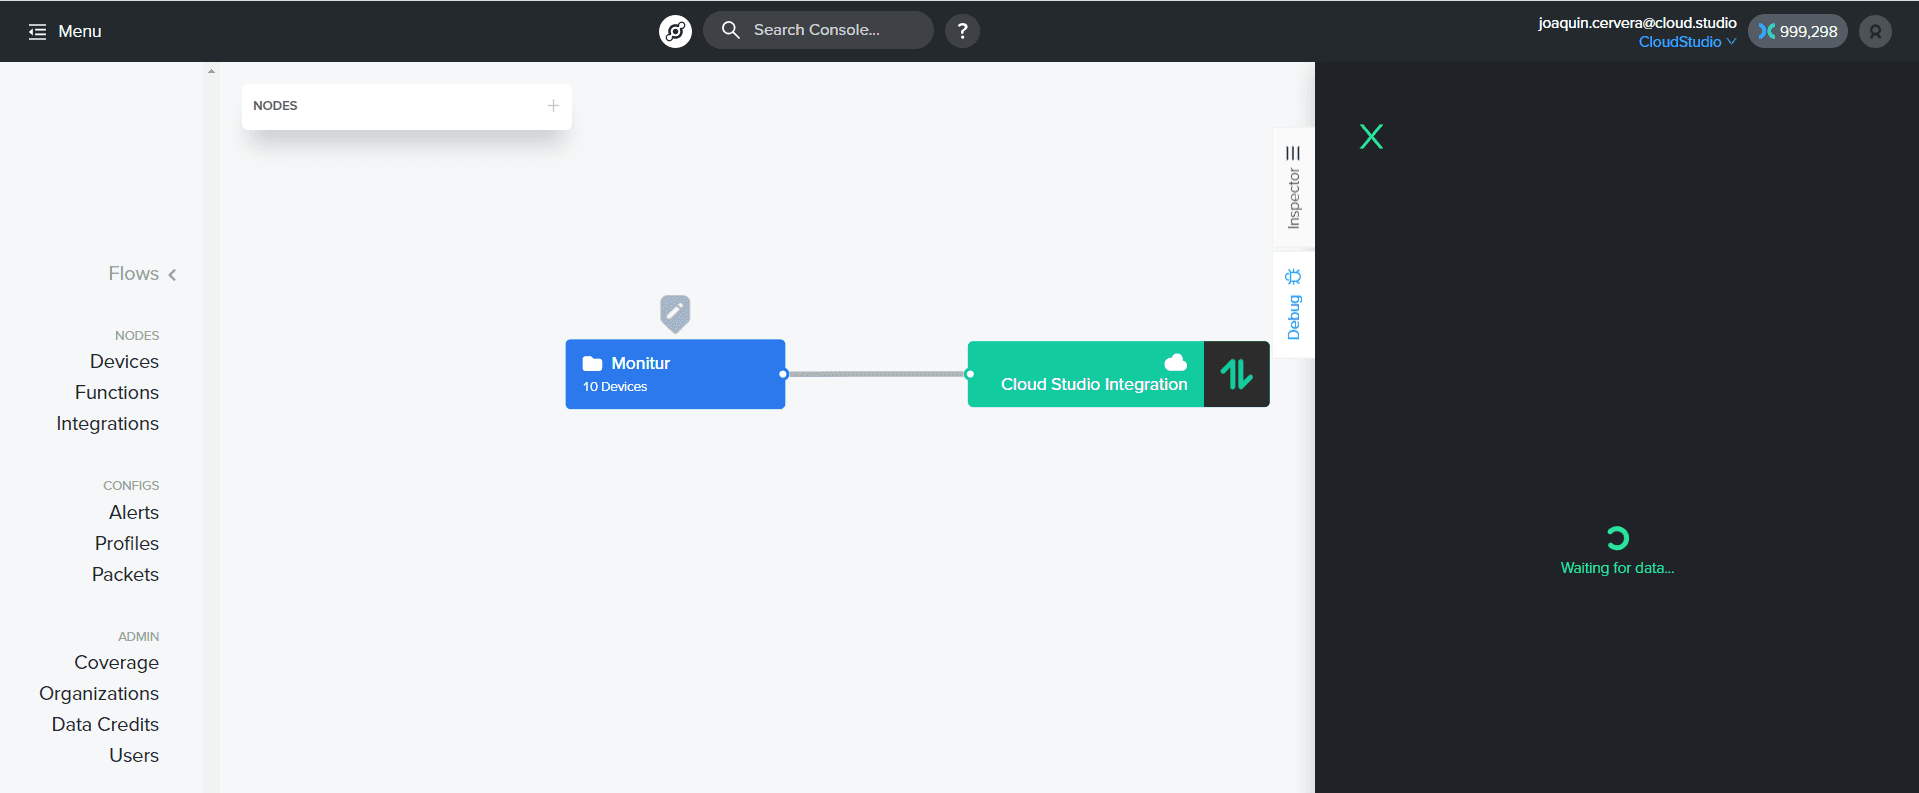
- You can verify the correct data delivery by clicking on the device and then clicking on the "Debug" tab.
Viewing Information on the Cloud Studio IoT Platform
Connect to your Gear Studio instance and navigate to the configuration.
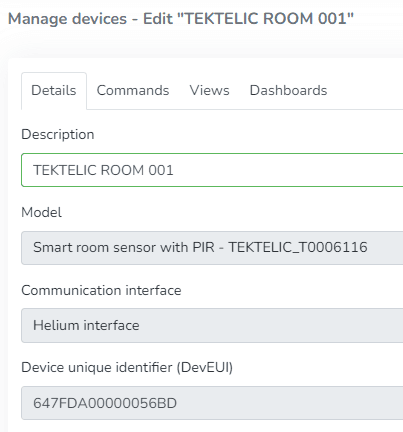
- Go to the Devices section and click the Add button to create a new Device.
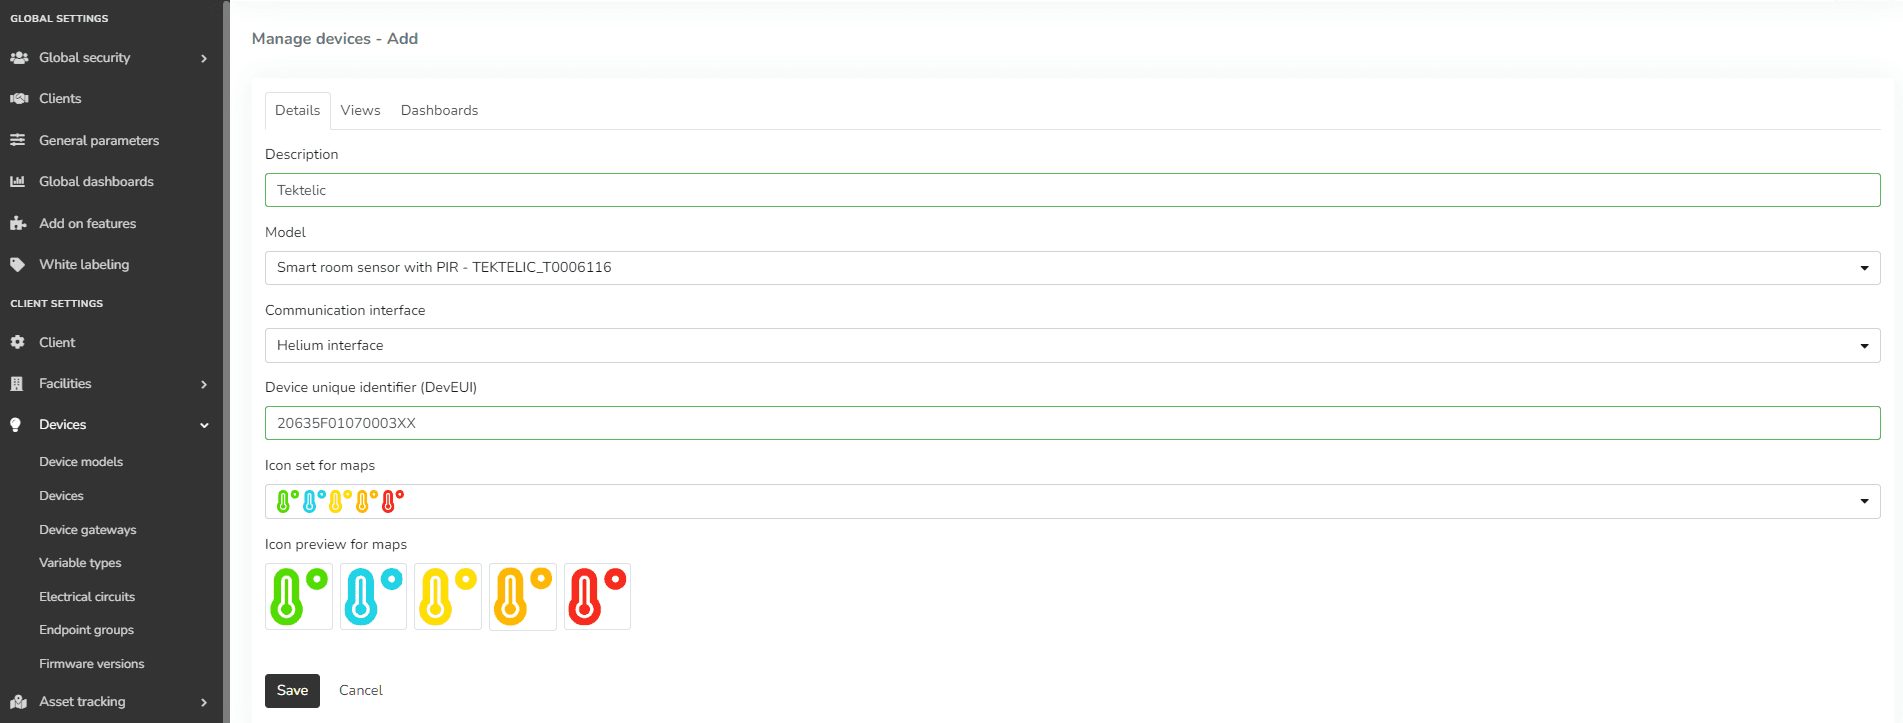
- Fill in the form using the Device Model created earlier (or using the available drivers), select the "Helium interface" communication interface, and the Address field corresponds to your DevEUI (find it in the Helium device list).
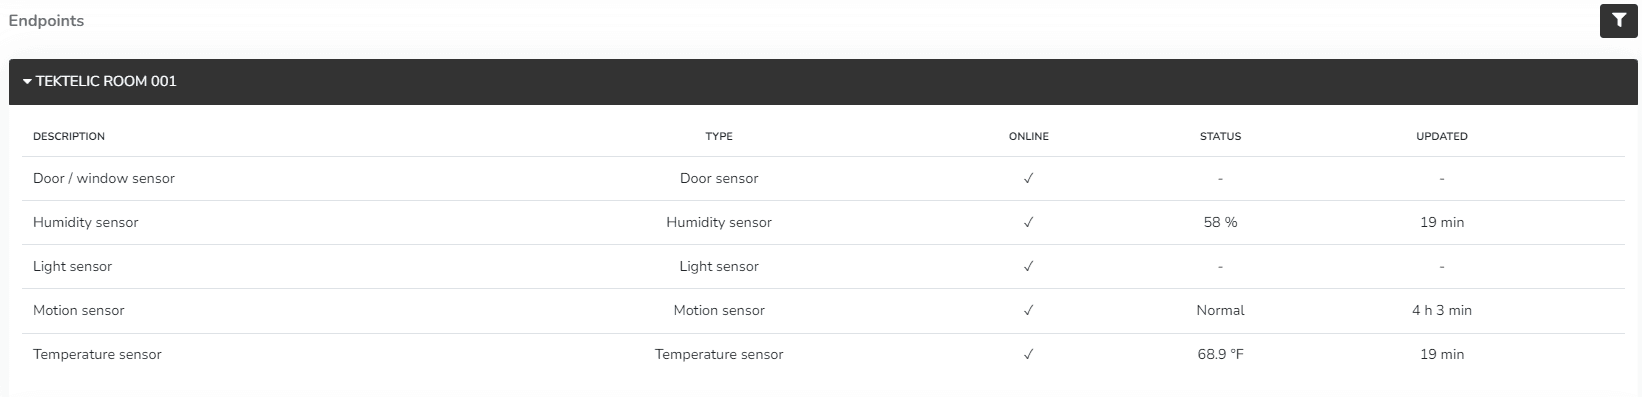
- After the device is created, data reported to the platform will be displayed in the Endpoints section in the left menu of the Monitor. Note that LoRaWAN devices may report every 5 to 15 minutes, so the display will depend on this interval.
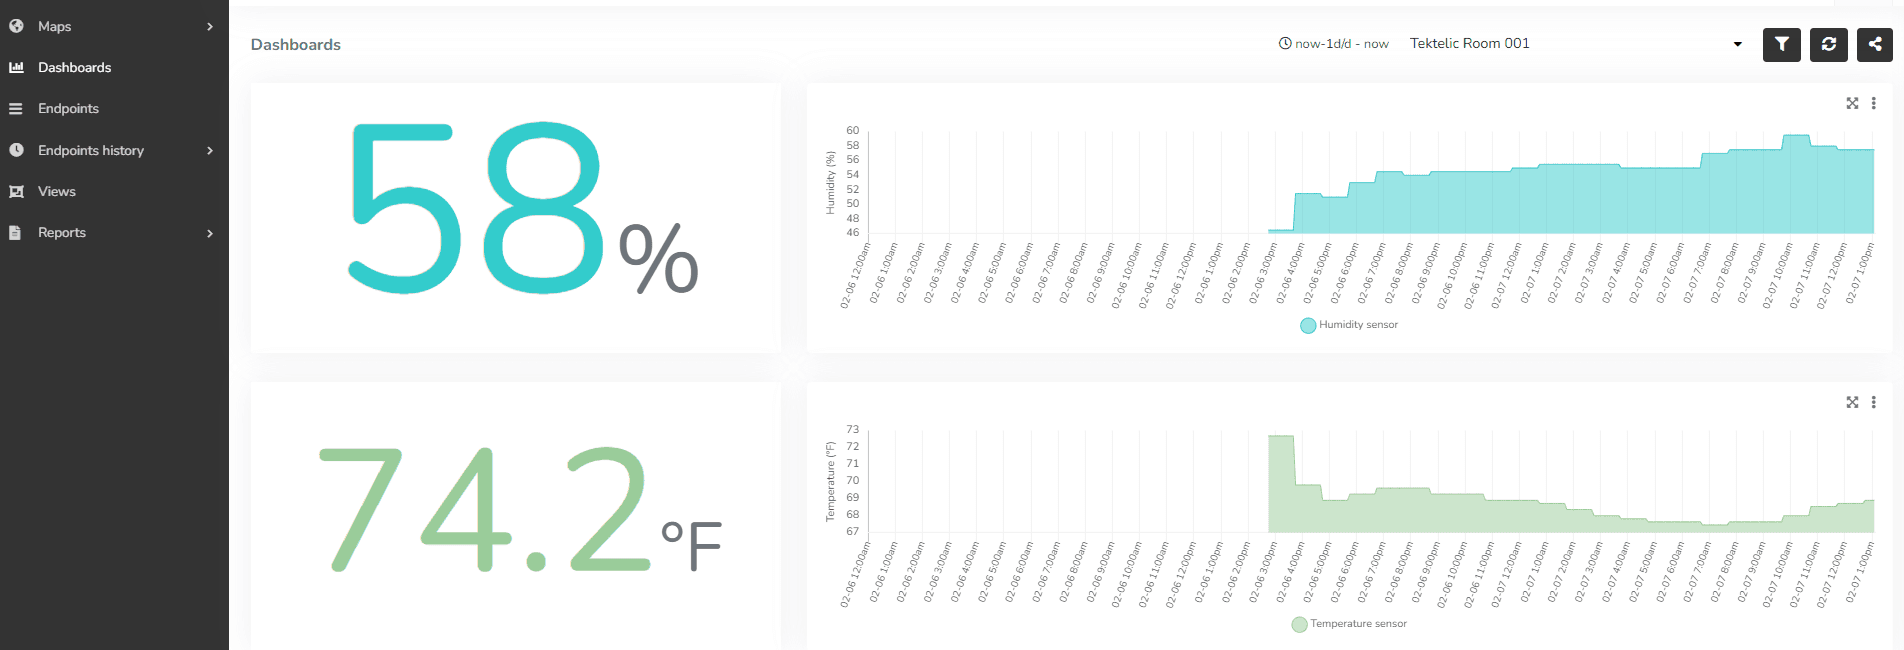
- Once the devices are correctly connected, you can create a custom Dashboard using a wide variety of Widgets to display the data being sent by the device.
Last updated on
LORIOT
The LORIOT integration enables the platform to have solid communication between a connectivity provider and a quality IoT Platform like Cloud Studio IoT.
Sensor Update Methods Matrix
Device-level data update This table contains the available methods for updating device data. Device property, Scripting method, HTTP method, HTTP RAW method.