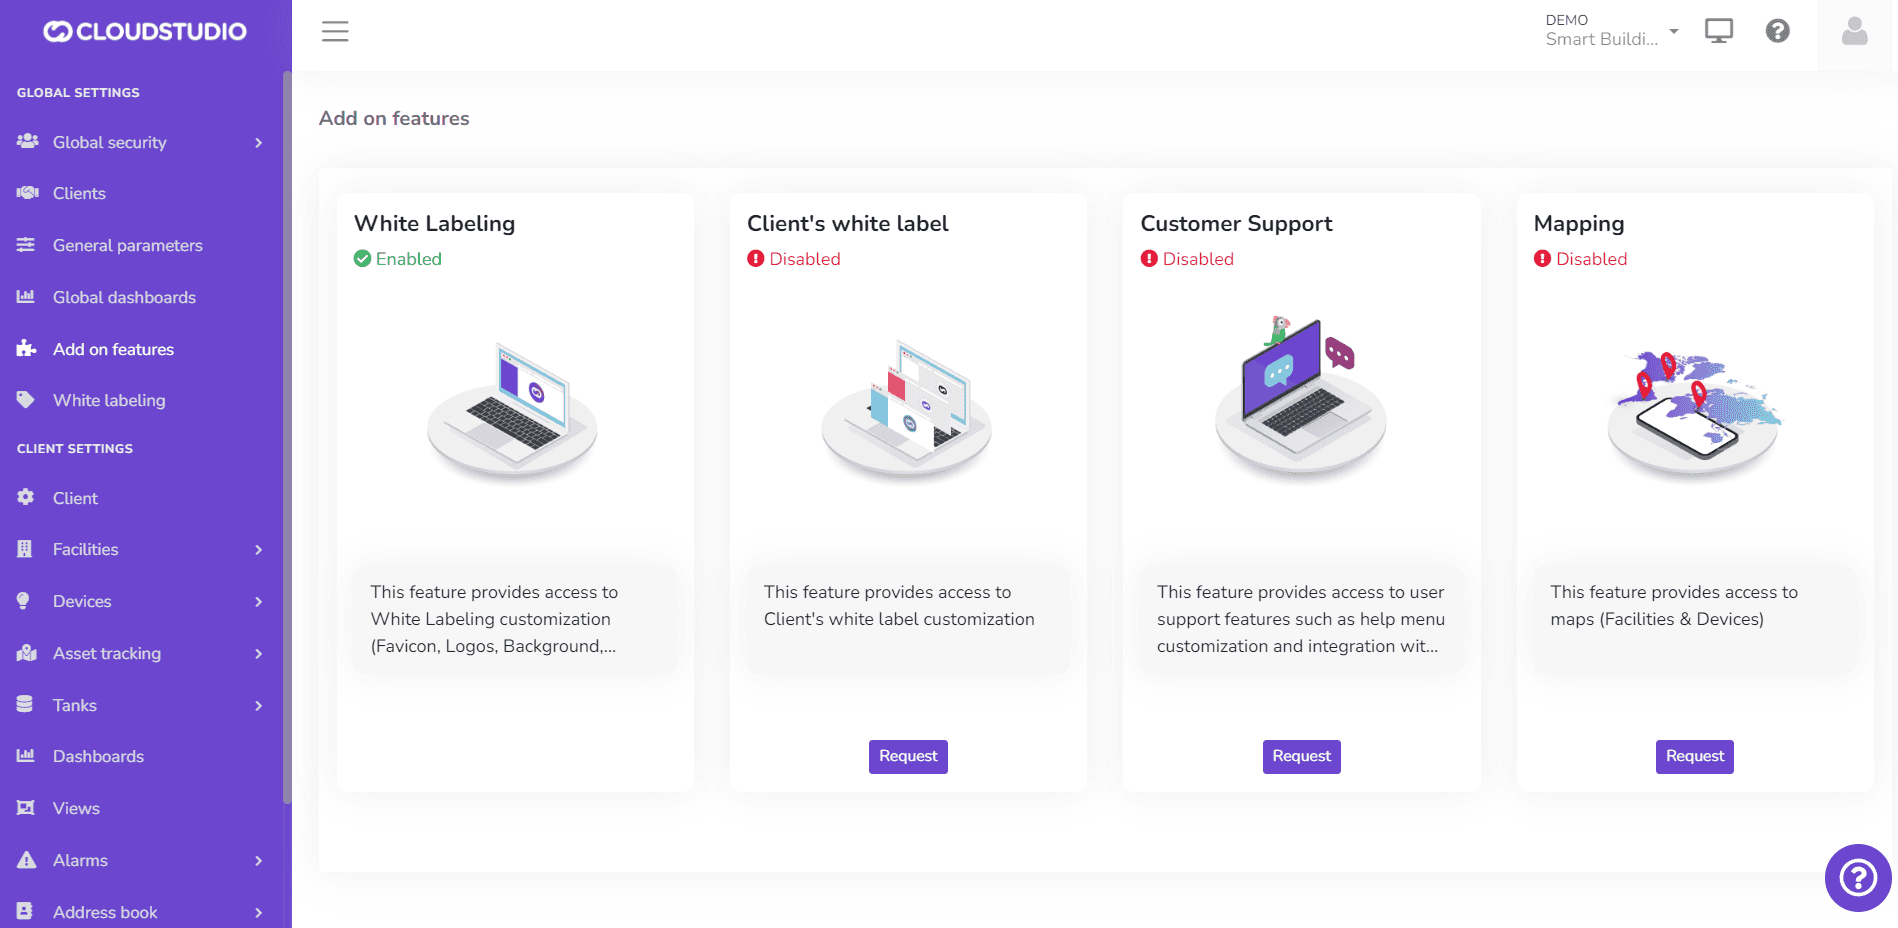
Additional Features
Introduction
Additional Features are advanced system functionalities specially designed to extend the tool's reach and provide greater platform customization and usage.
These add-ons can be requested by clicking the "Request" button below each feature.
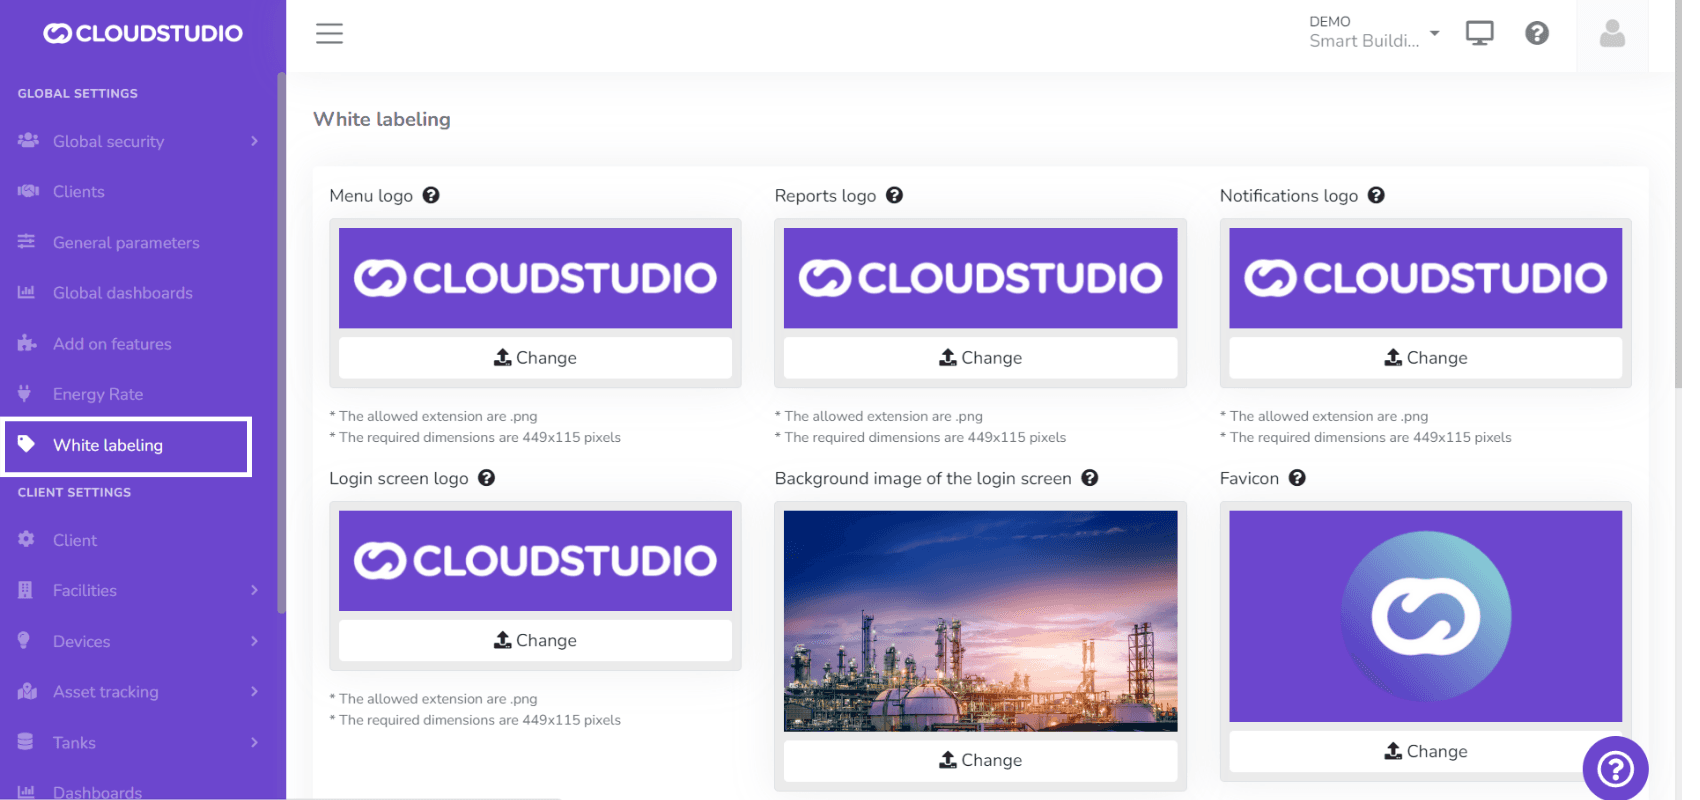
Instance-Level White Labeling
The White Labeling feature gives users the ability to customize the platform, creating a unique usage experience that adapts to their brand identity. From this section, you can customize the logo in the menu, reports, notifications, and login screen. It also provides color palette selection, login screen background image, and chat and help page settings.
From this option, you can enable instance-level White Labeling. Learn more about how it works on this page.
Client-Level White Labeling
This advanced White Labeling feature enables platform customization for different clients within the same instance. Learn more about how it works on this page.
Notes: - The Client White Labeling feature is not included in all subscription plans. Contact our sales team for pricing and activation. - To request activation of this feature, Instance White Labeling must be enabled first.
_ba2c.png&w=1920&q=75&dpl=dpl_H3XnPBpQP9upyjh7HhQPFEaqGfX6)
User Support
This feature enables integration with Tawk.to, also facilitating help menu customization. Once enabled, it can be used from the White Labeling menu.
From this option, the user can configure the appearance, availability, and options of the application's help chat.
Note: It is important to remember that the plugin configuration is customizable so the user can create their own plugin application and, with the chat owner's ID, replace it to view it in both English and Spanish. The colors and texts customized by the user from Tawk.to will also be displayed there. When the user does not enter their own data, the user support button will not be visible. - To request activation of this feature, Instance White Labeling must be enabled first.


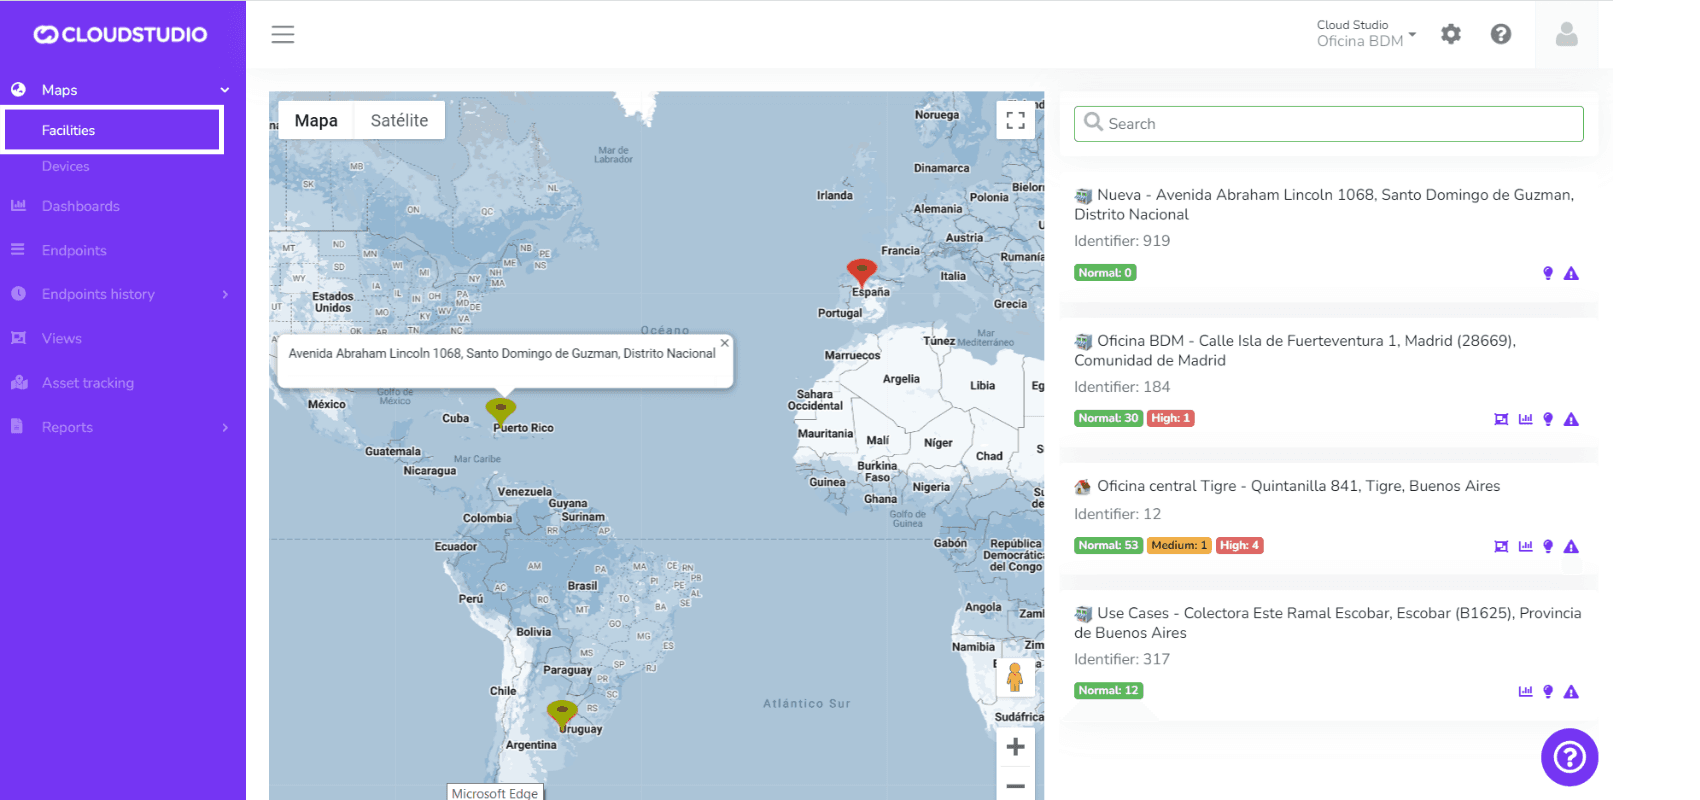
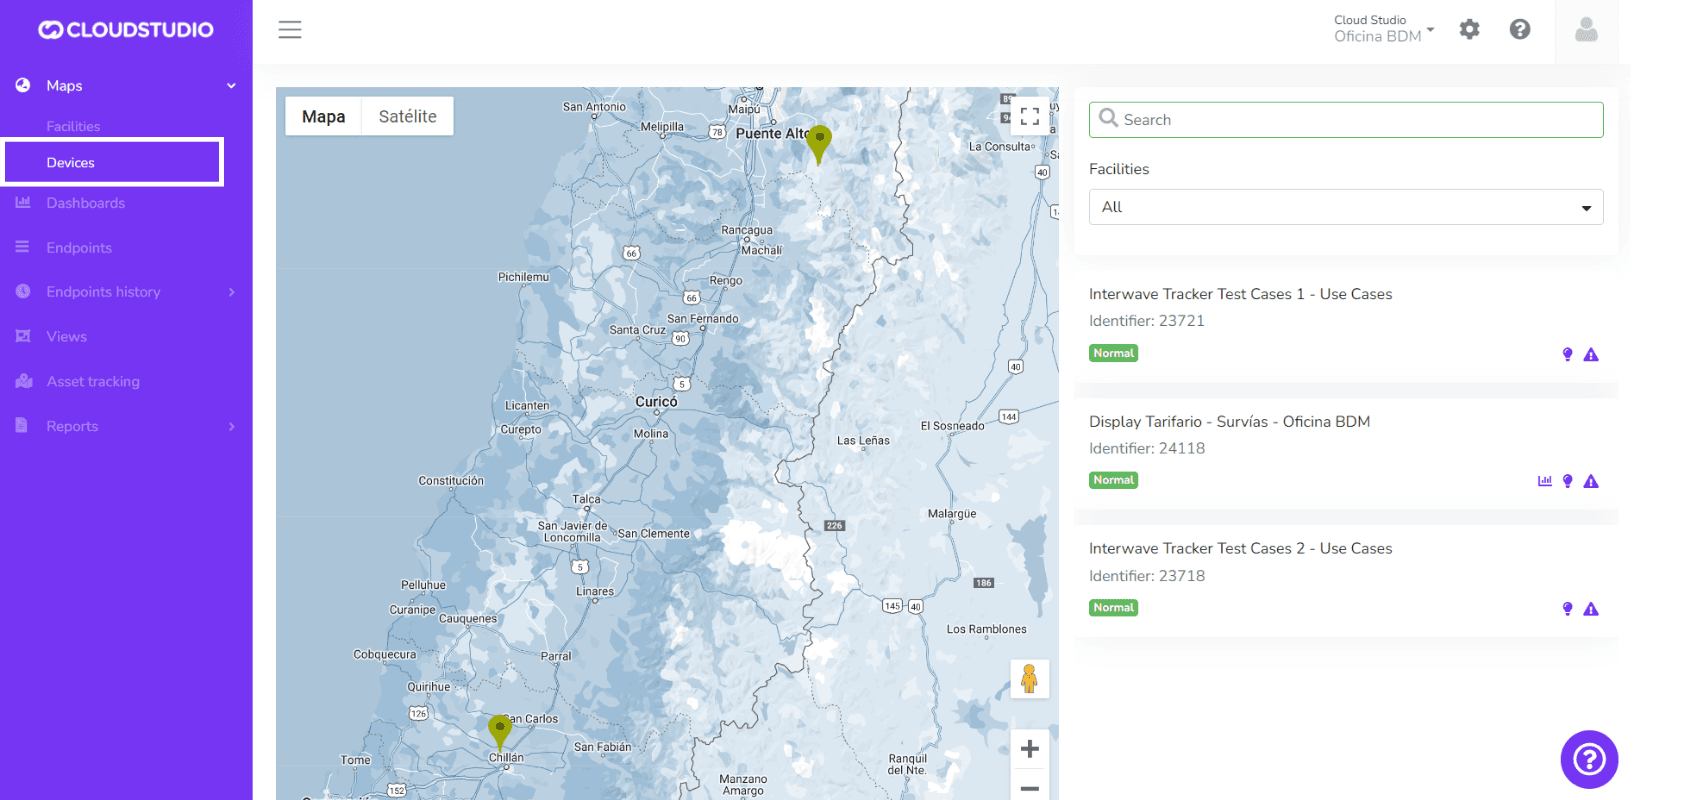
Mapping
This feature enables the display of Facility and Device maps in the monitor.
Facility Map
For more information about the facility map, check this page.
Device Map
For more information about the device map, check this page.
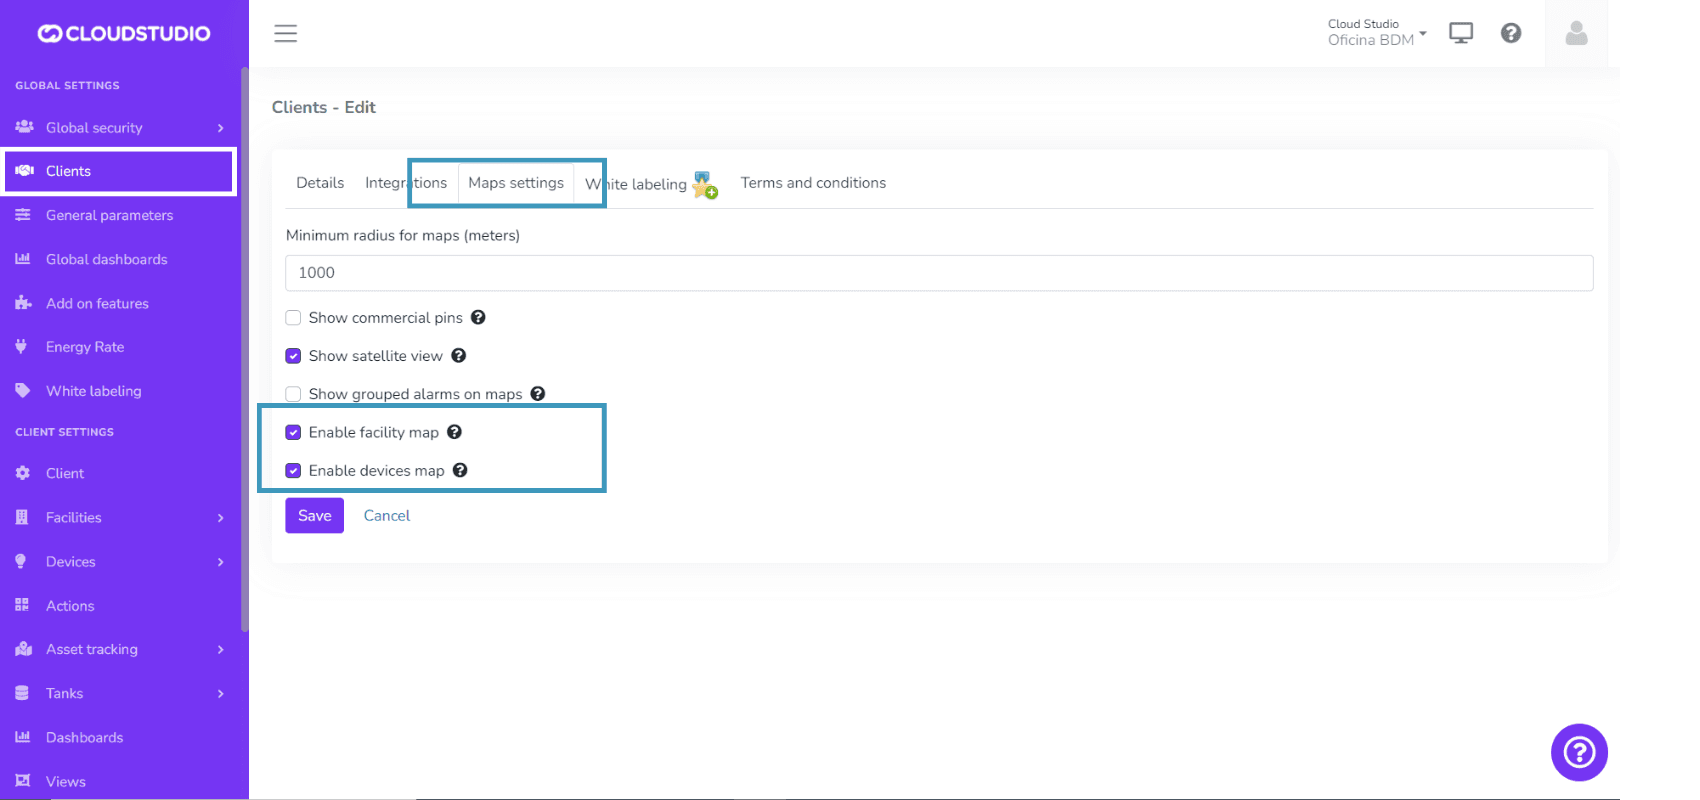
How to enable and disable maps?
Once the feature is enabled from Additional Features, to modify the map views go to Clients in the Global Configuration menu.
Choose the client for which you want to modify the map views.
_7ad8.png&w=1920&q=75&dpl=dpl_H3XnPBpQP9upyjh7HhQPFEaqGfX6)
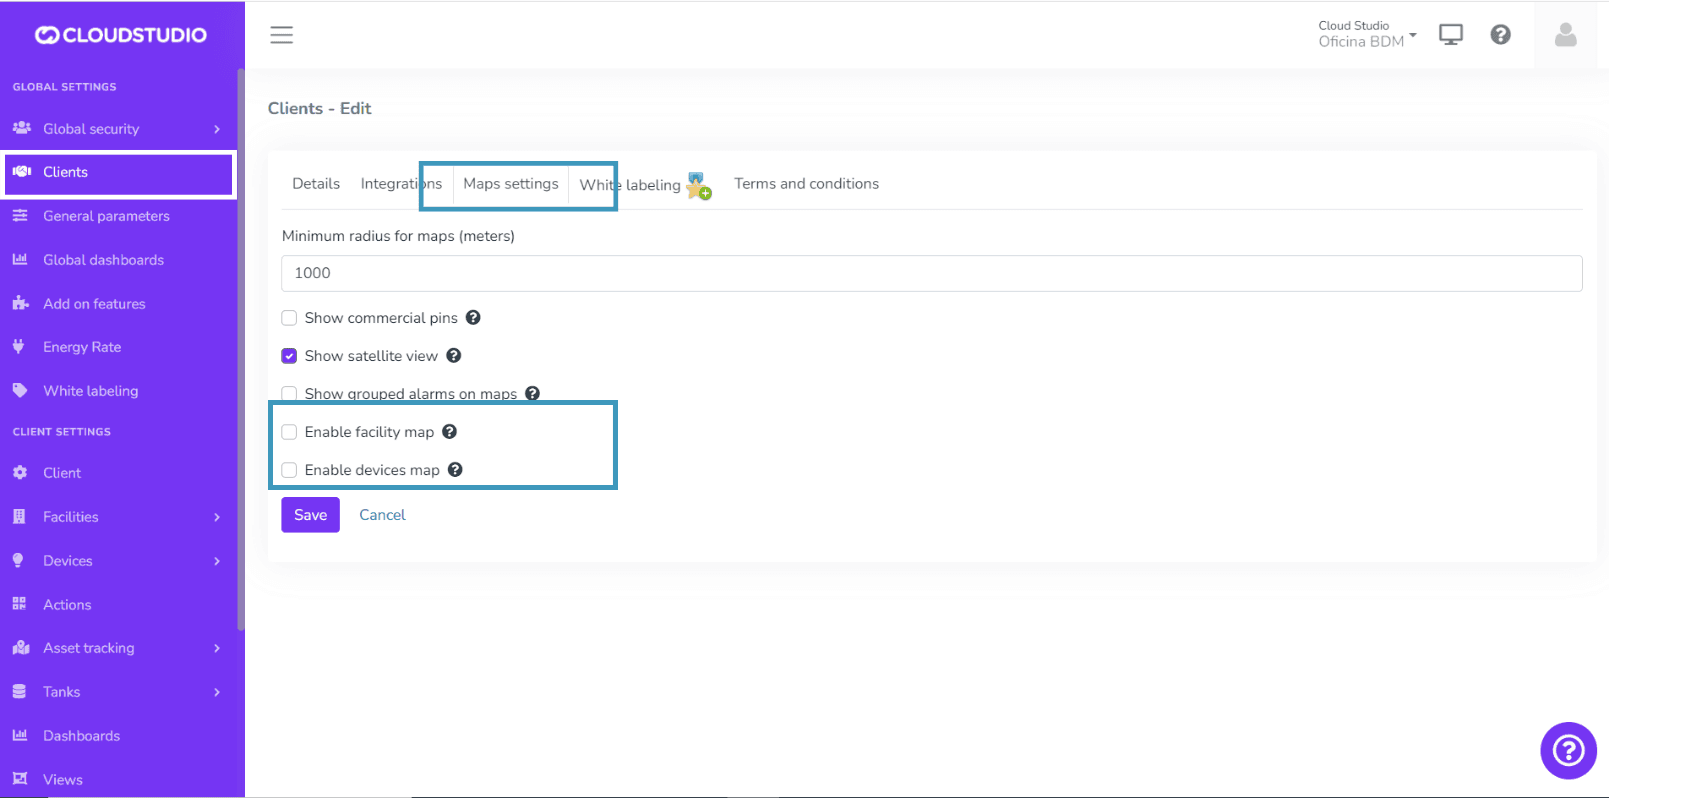
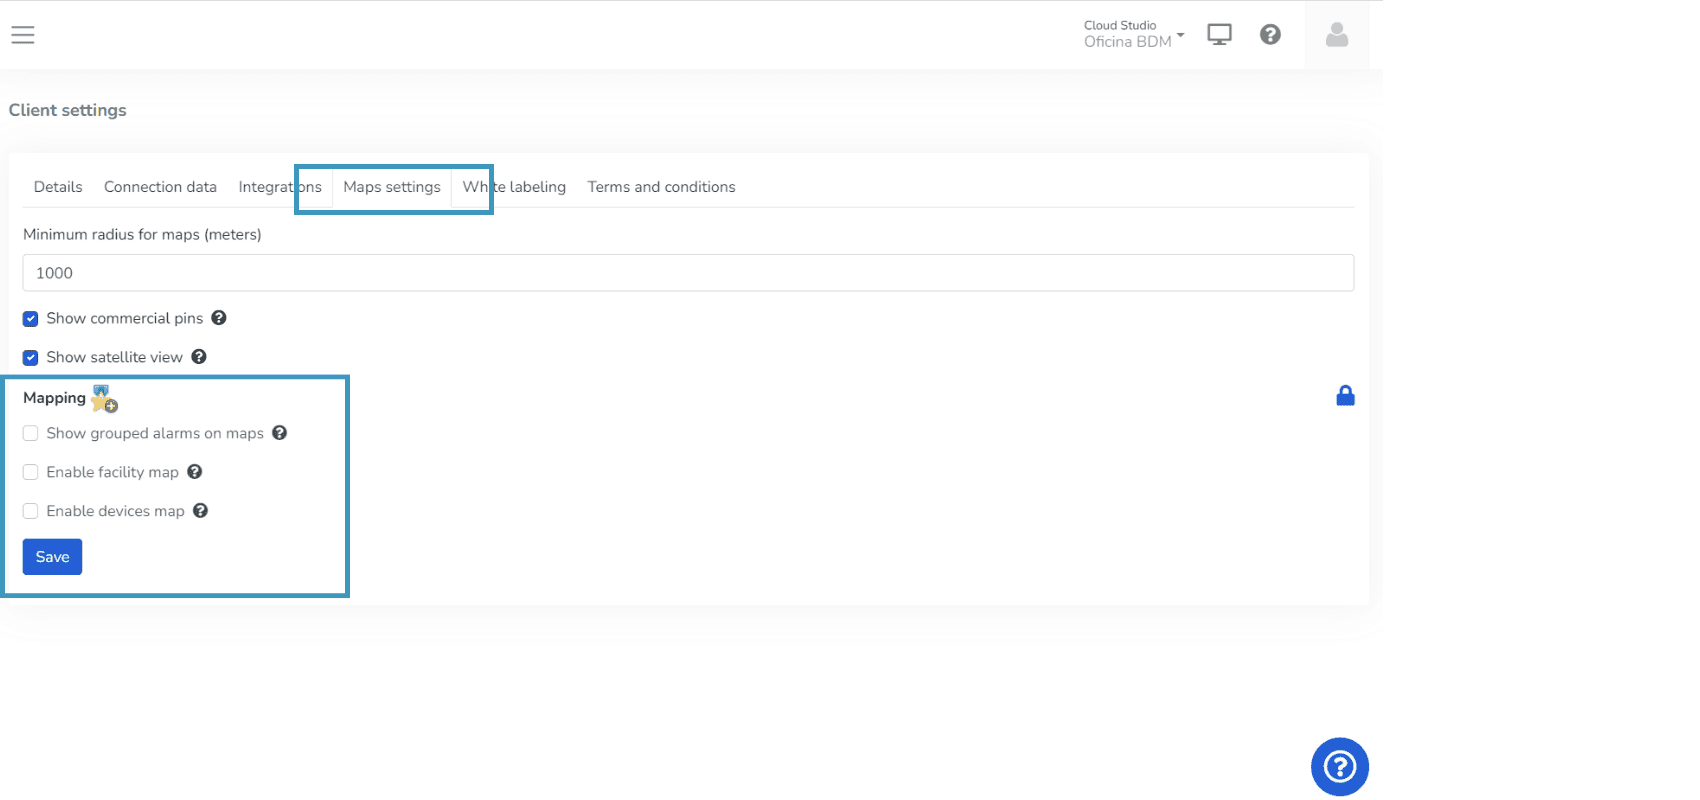
Find the Map Settings tab and check the Enable facility map and Enable device map checkboxes. Select the checkboxes to show the maps and deselect them otherwise, then press the Save button.
Maps enabled
Maps disabled
Note: If the feature is disabled, you will not be able to modify the checkboxes and you will see the Mapping title with an icon above them.
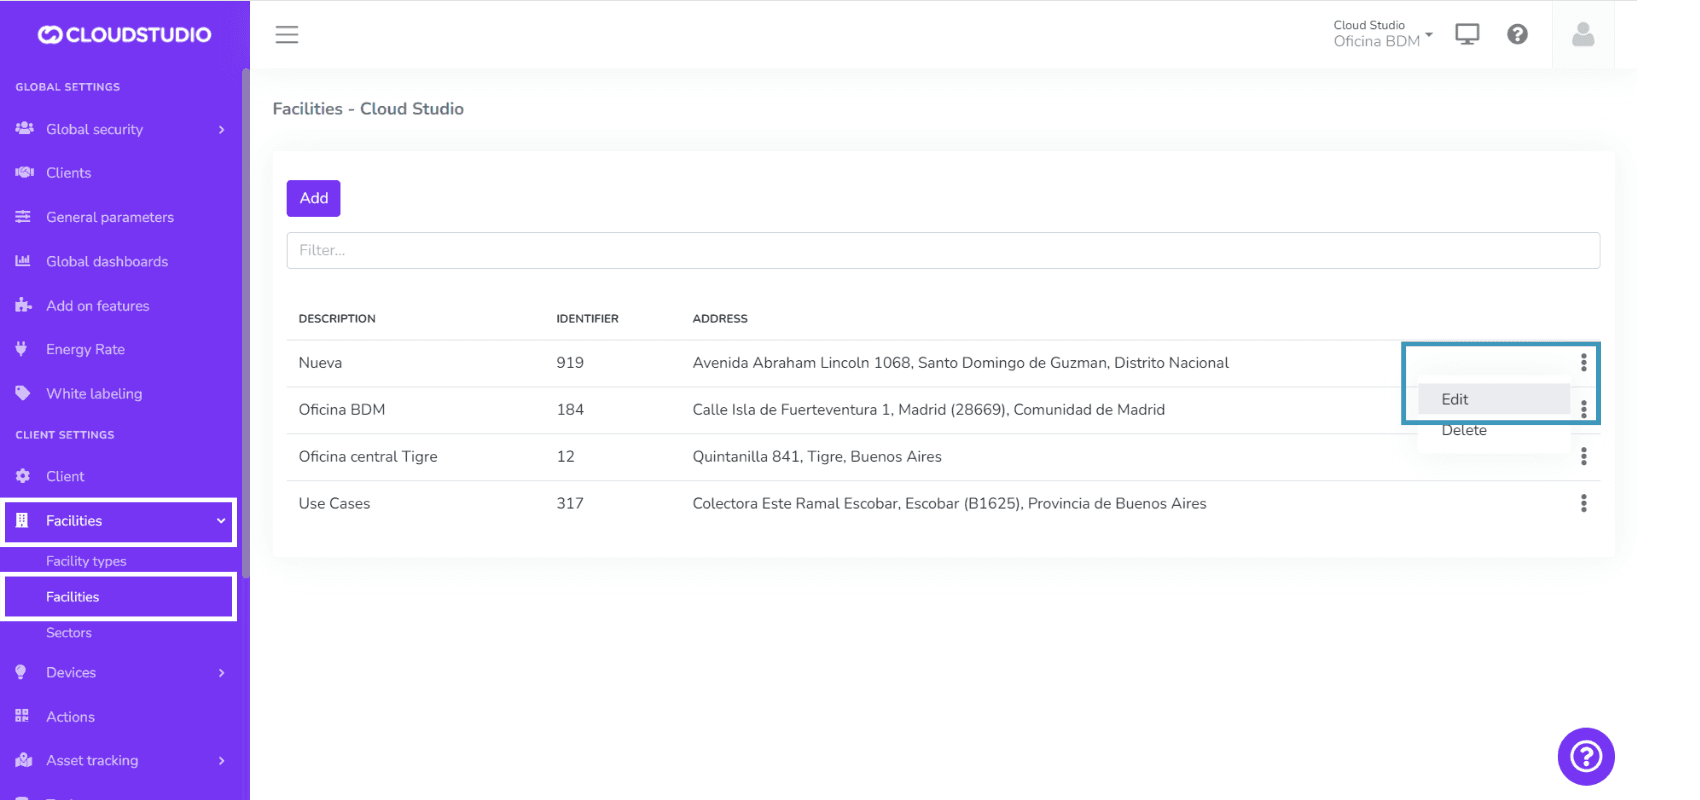
How to modify the location of Facilities and Devices on maps?
Facilities
The location of Facilities can be specified as follows:
- Go to the Client Configuration menu, find the Facilities option, and select the Facility you want to edit.
- Once inside the Facility configuration, you can enter the location coordinates in the Latitude and Longitude fields.
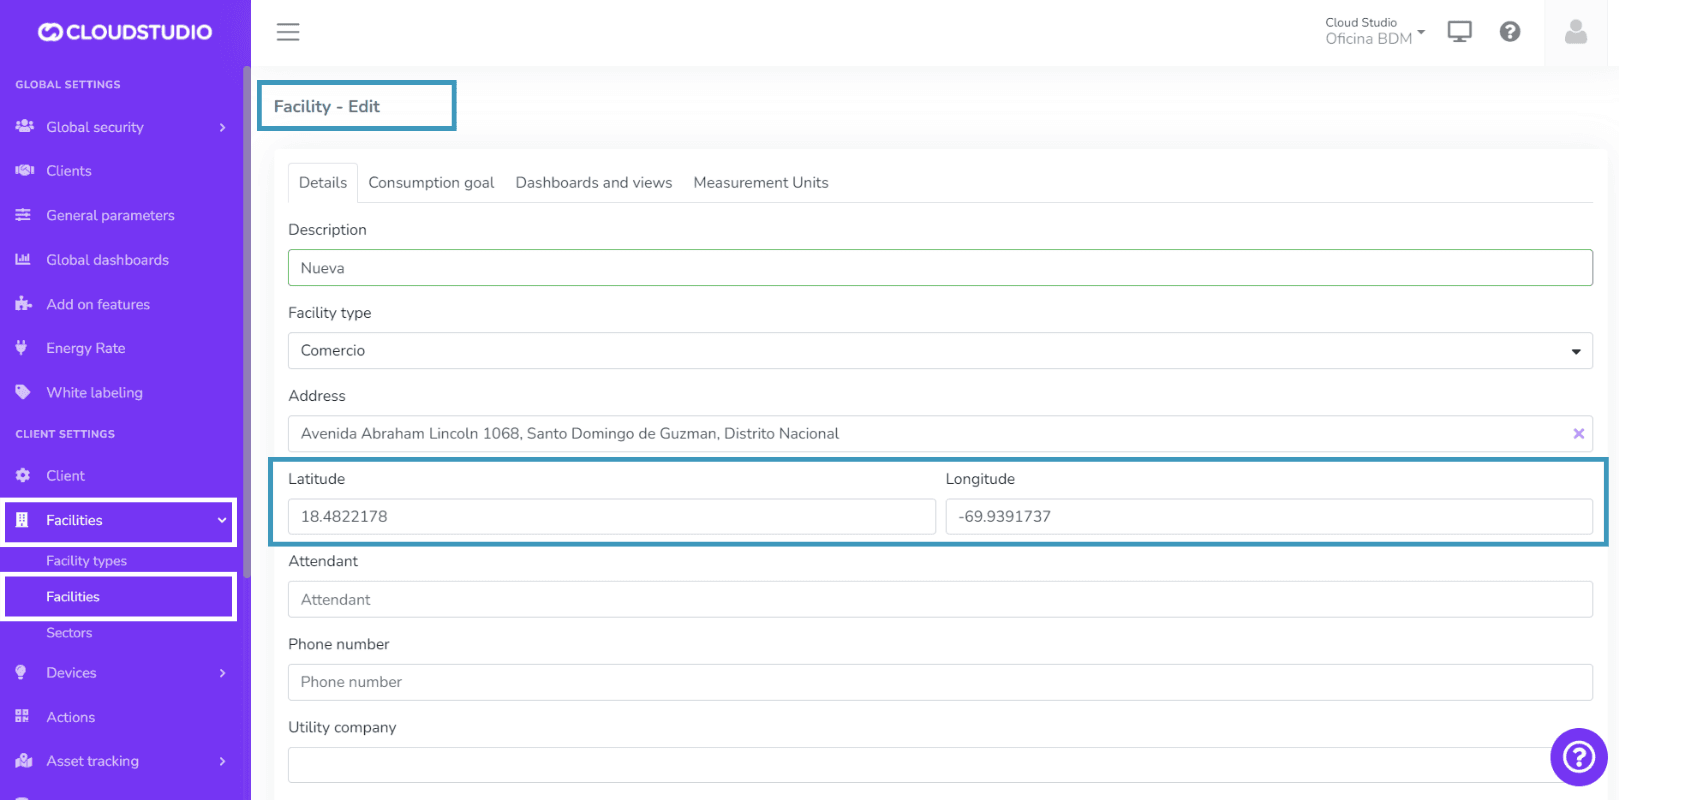
- Press the Save button to see the location change on the map.
Devices
You can learn how to modify a device's location on the following page.
Map Icons
This feature enables customization of Facility, Device, Tank, and Vehicle icons on maps.
How to choose icons?
You will have several icon groups available to select for facilities, devices, and vehicles. From their configuration, you can choose the icon group that best suits your instance.
Facility icon configuration
Go to the Client Configuration menu, find the Facilities option, and select the Facility to edit.
_eb5b.png&w=1920&q=75&dpl=dpl_H3XnPBpQP9upyjh7HhQPFEaqGfX6)
Select the desired icon group and press Save to display it on the map.
_b32d.png&w=1920&q=75&dpl=dpl_H3XnPBpQP9upyjh7HhQPFEaqGfX6)
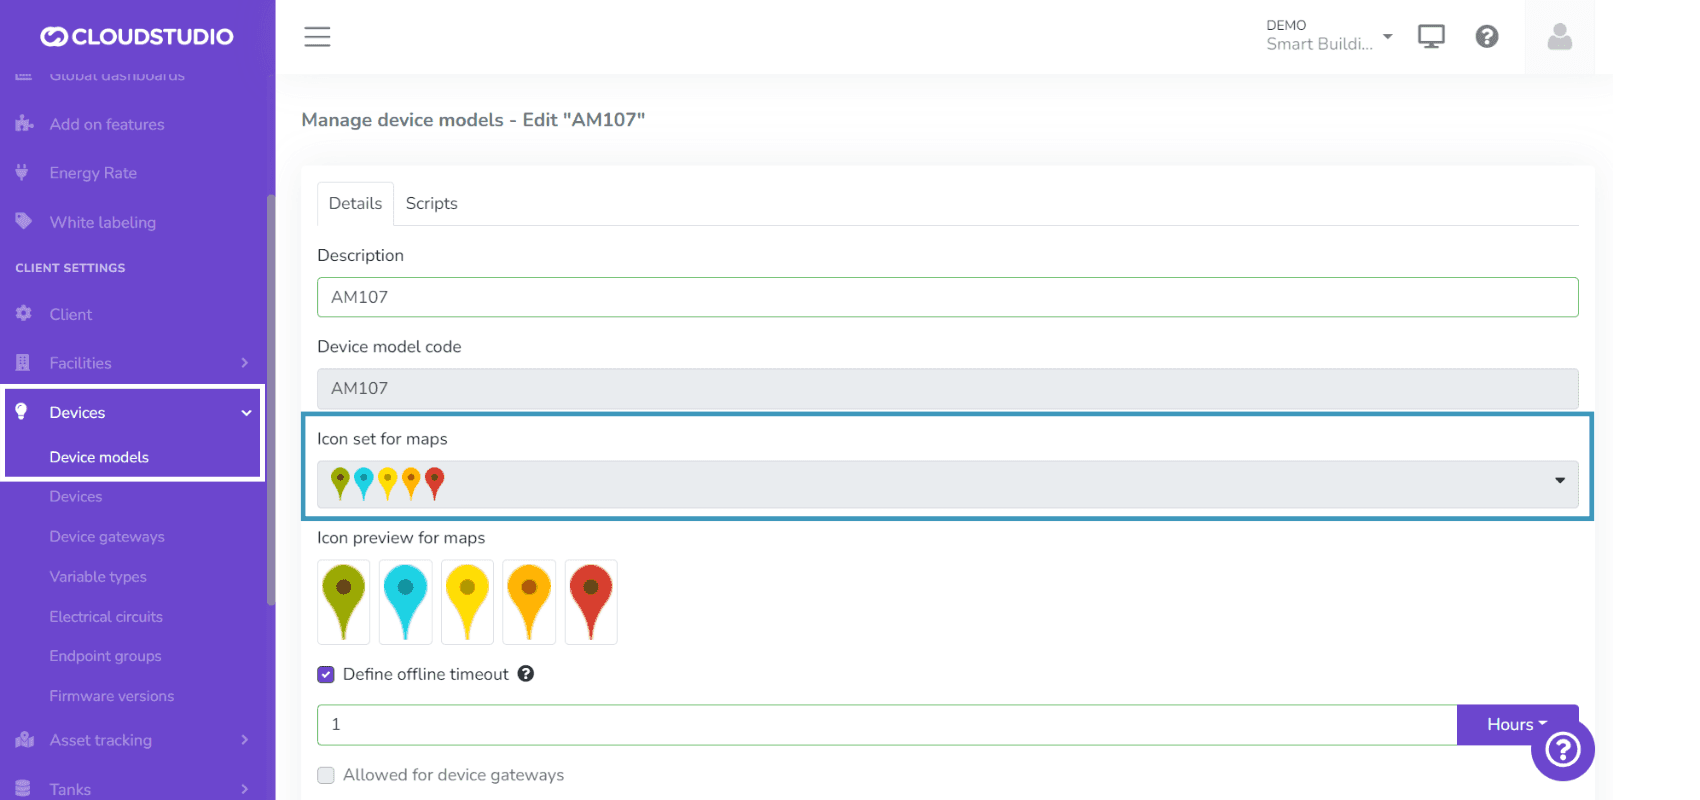
Device icon configuration
Go to the Client Configuration menu, find the Device Models option, and select the device to edit.
_9bd2.png&w=1920&q=75&dpl=dpl_H3XnPBpQP9upyjh7HhQPFEaqGfX6)
Select the desired icon group and press Save to display it on the map.
Select the desired icon group and press Save to display it on the map.
Vehicle icon configuration
Go to the Client Configuration menu, find the Fleet Tracking option, enter Vehicles, and select the vehicle to edit.
Select the desired icon group and press Save to display it on the map.
_4f46.png&w=1920&q=75&dpl=dpl_H3XnPBpQP9upyjh7HhQPFEaqGfX6)
Tank icon configuration
Go to the Client Configuration menu, find the Tanks option, and select the tank to edit.
Select the desired icon group and press Save to display it on the map.
_ea5d.png&w=1920&q=75&dpl=dpl_H3XnPBpQP9upyjh7HhQPFEaqGfX6)
Extended Authentication
This feature enables user authentication during the login process through external providers such as Auth0. To learn how the login process works, go to this page.
- Configuring this feature requires having an Auth0 instance. - This instance can be provided by Cloud Studio or owned by a client. For more information, contact contacto@cloud.studio
Last updated on