Report Export Customization
This feature allows customizing the subject and body of the email sent when scheduling a report. Additionally, it allows adjusting the name of the attached document, the header, and the footer.
Export configuration
In the download dropdown of each report, a new option called "export configuration" will appear.
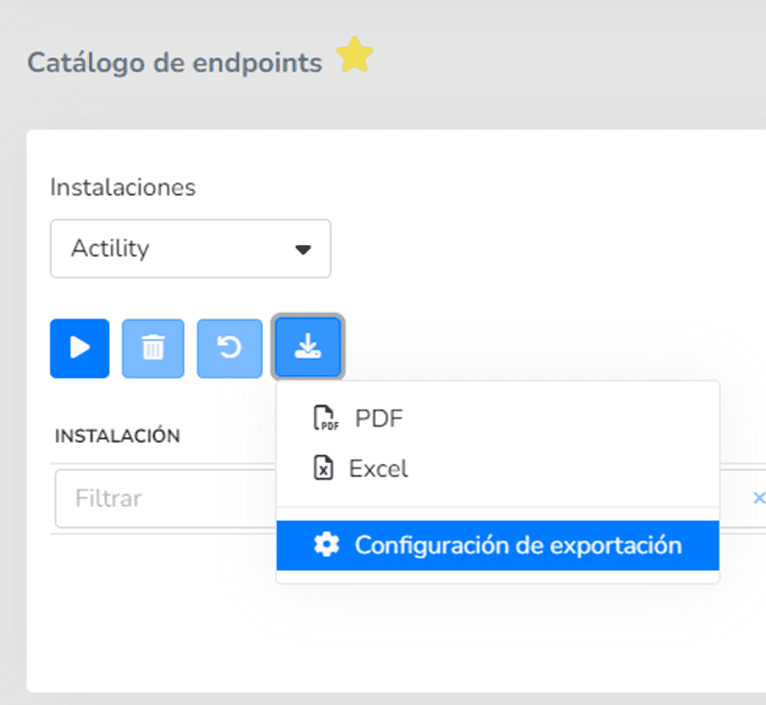
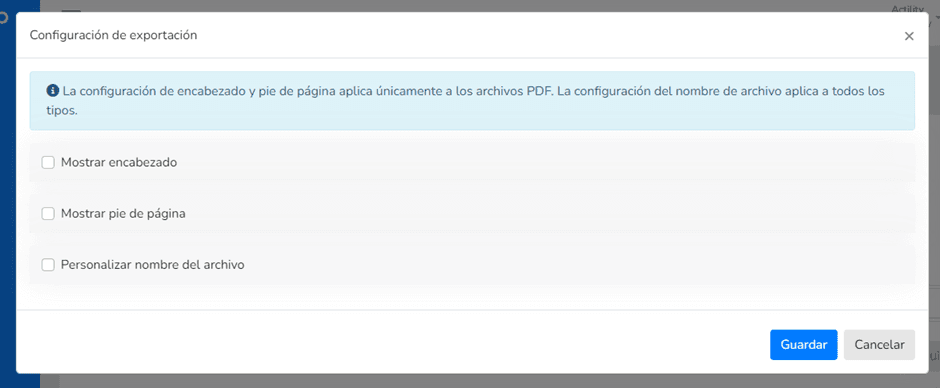
This option will open a modal that allows customizing the header, footer, and generated file name. Additionally, through a checkbox, it allows enabling or disabling each of these settings. For example, you can deactivate the display of the header and footer:
Header and Footer
When enabling either option via the checkbox, a code editor will appear below each one to enter the HTML template you want to use for the report's header or footer.
File name
When enabling the customize checkbox, a text field will appear where you can type the custom name for the file that will be generated during export. Only alphanumeric values and hyphens are allowed.
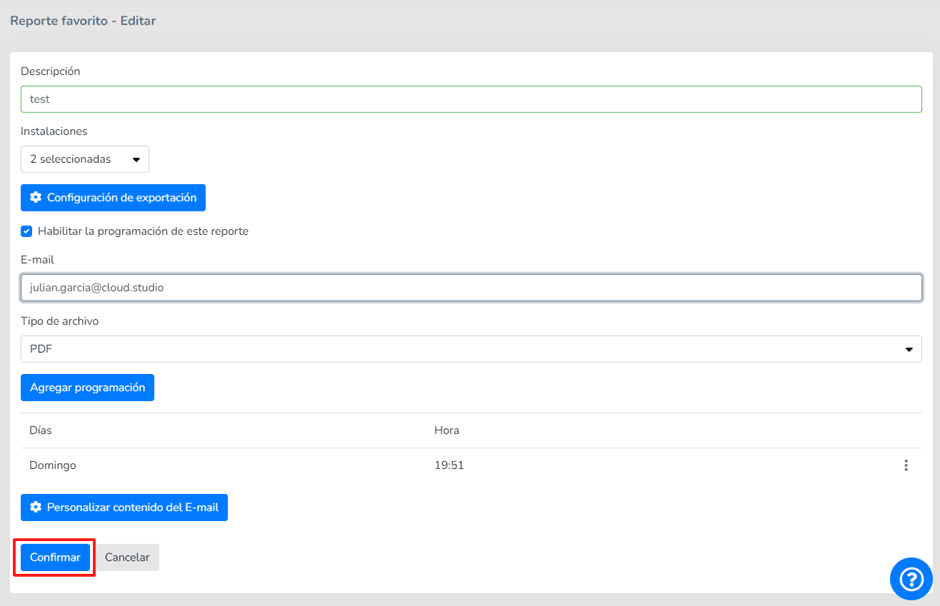
Save as favorite
When saving the report as a favorite, the export configuration (header, footer, and file name) will also be saved. It can subsequently be edited from the favorite editing view:
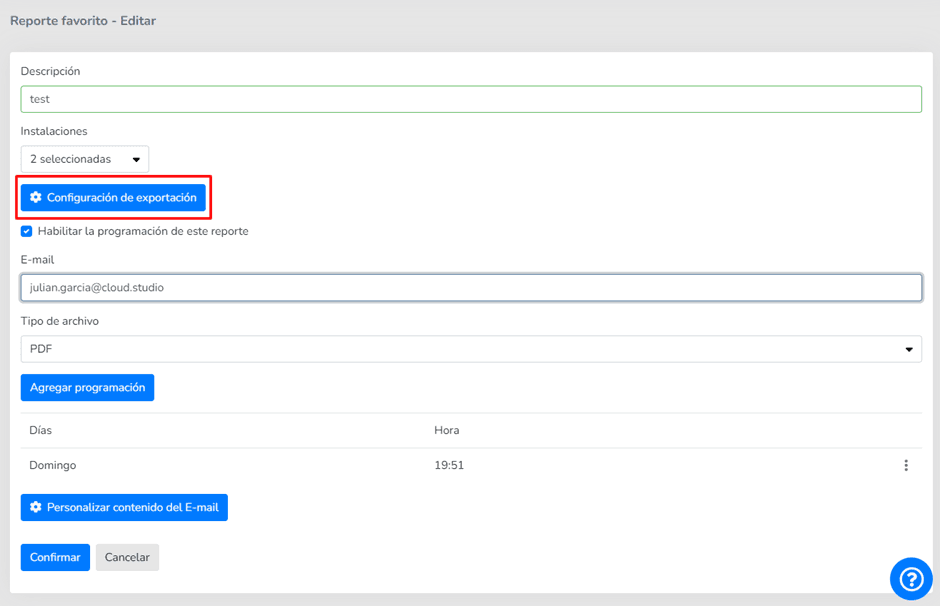
When pressing the configuration button, the same modal mentioned above will appear with the export settings.
It is worth noting that if the report is scheduled, it will also be generated with the saved configuration.
Notification email customization
When saving a favorite report, it can be scheduled to be sent according to the established criteria. Below the scheduling options, a button with the text "customize E-mail content" has been added, which allows customizing the subject and content of the email sent when scheduling a report:
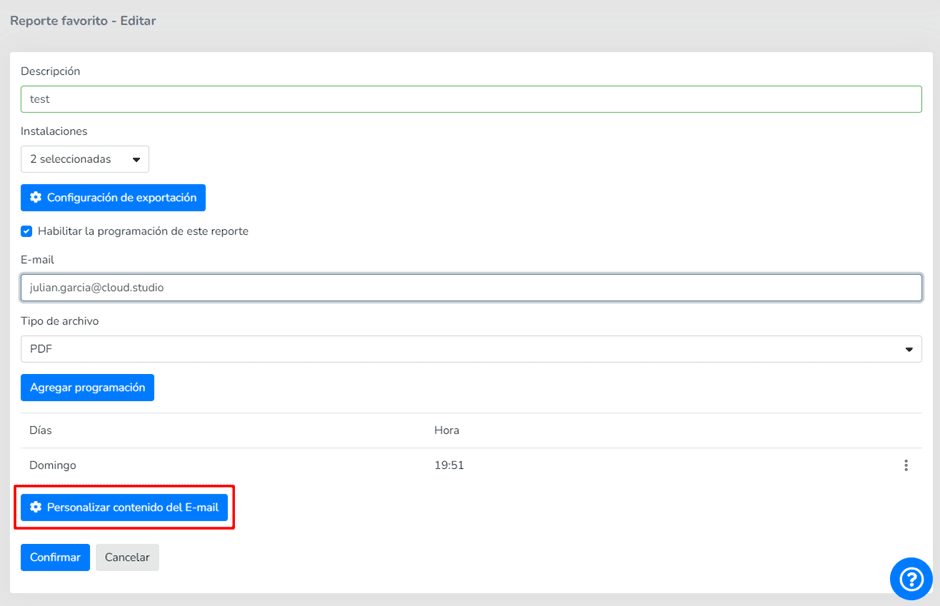
When pressing this button, a modal will open with a code editor and a checkbox to enable or disable subject customization:
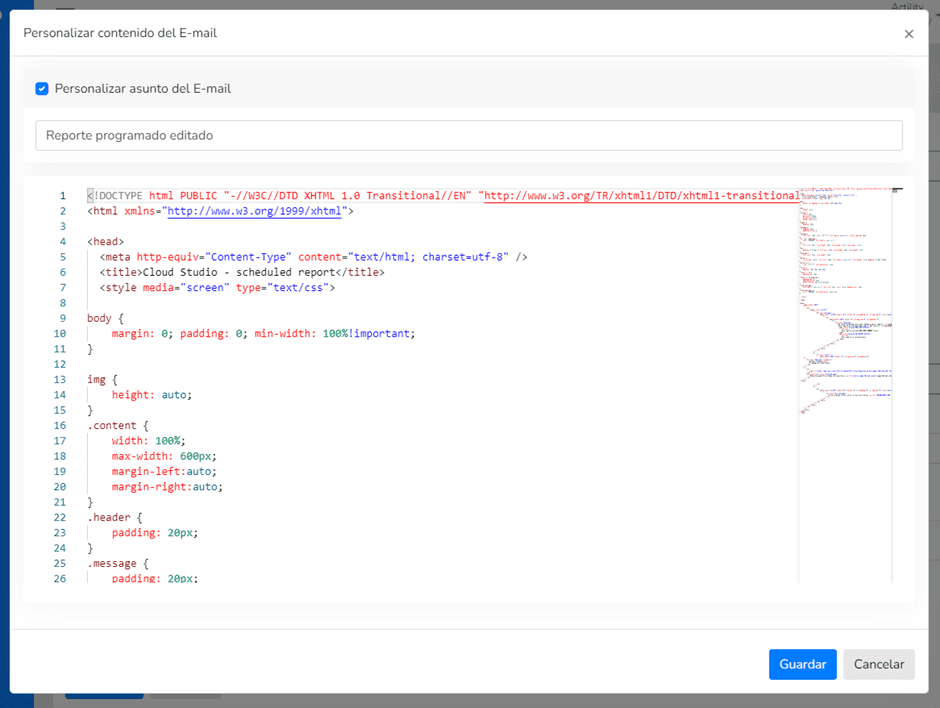
Subject
Through a checkbox, you can enable or disable subject customization. If the checkbox is enabled, a text field will appear allowing you to enter the custom subject text.
Body
Below the subject, a code editor field will appear that, by default, shows the template currently used in Gear Studio.
To save changes made to a favorite's customization (both email and export configuration), you must save the favorite. That is, press the "confirm" button on the favorite report editing screen:
Last updated on
Configured Notifications Report by Instance
This report lists the notifications configured at the instance level, considering all Clients and Facilities it contains. Filters: Client (all or selected list)...
Data Extraction APIs
Introduction This section explains how to extract data from the Gear Studio platform using the HTTP API, such as: Alerts: the API allows extracting the...