The Things Stack (TTN / TTS)
The integration with The Things Stack allows the platform to communicate with LoRaWAN devices using a variety of gateways available on the market. This article describes the steps necessary to complete the integration.
Requirements
The integration is very straightforward and only requires the following:
- An instance identifier. Depending on your Gear Studio subscription, the most common instance names are:
- gear.cloud.studio. This instance name corresponds to a common Gear Studio instance, including the free version.
- xxxx.cloud.studio. This instance name corresponds to Flex instances where hosting is provided by Cloud Studio, but the client can choose the subdomain used (xxxx).
- Other. For Enterprise clients using their own domain, the chosen domain name should be used.
- An Access Token. Data sent from TTN will use this access token to access the platform, and therefore TTN will have the permissions associated with this access token. It is recommended to create a new access token specifically for the TTN integration to simplify security control.
Configuration in TTN
To configure the integration in TTN, follow these steps:
- Create an application (if you do not already have one)
- Configure the webhook integration with the Gear Studio platform.
- Connect devices to this application and verify that information is received correctly.
- Register the devices on the Gear Studio platform.
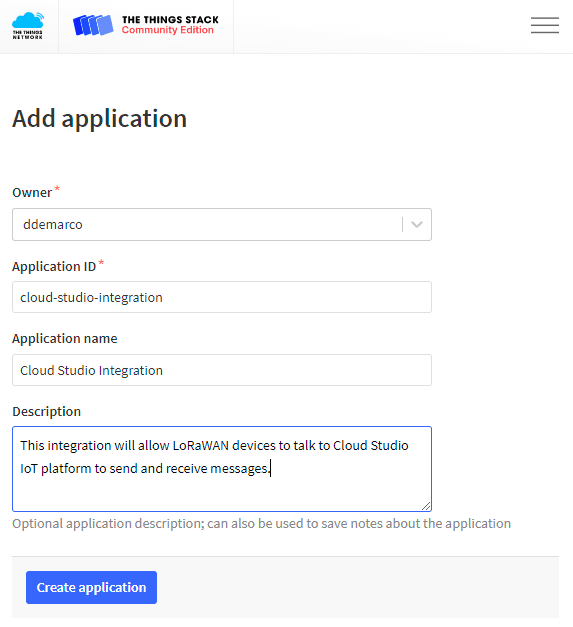
Creating an Application
If you do not already have an application in TTN, you will need to create one. To do this, follow the online tutorials and videos available, such as:
- Adding Applications | The Things Stack for LoRaWAN (thethingsindustries.com)
- Creating applications and adding devices to The Things Stack - YouTube
Below is an example of what the application creation window looks like:
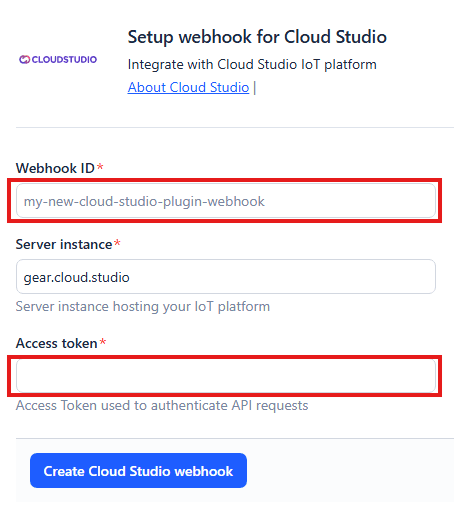
Configuring Webhooks in TTN
To enable TTN to exchange information with the Gear Studio platform, a webhook integration must be used. The Cloud Studio webhook can be used for this purpose.
Integrations > Webhooks > Add webhook

When using the webhook, use the following values:
- Webhook ID: any name can be freely chosen, for example "cloud-studio". The name cannot contain spaces and other special characters, but can include hyphens.
- Access token: an access token with permissions to update device information. See this page for more information.
Below is an example of the Cloud Studio webhook pointing to the Gear Studio platform, using the default instance.
Installing Devices in TTN
If you have not done so already, also install the devices in The Things Network. To do this, you can follow the online tutorials available, such as:
- Adding Devices | The Things Stack for LoRaWAN (thethingsindustries.com)
- Creating applications and adding devices to The Things Stack - YouTube
Once the devices are created, verify that The Things Network receives device data correctly.
Installing Devices on the Gear Studio Platform
Finally, for the Gear Studio platform to accept the registered data, the devices need to be added. This process will depend on whether the device is already supported on the platform, either natively or by having manually created an appropriate device model.
If the Device Model Is Not Natively Supported
If the device model is not natively supported by the platform, you will first need to create a device model on the platform by following these steps. Once the device model is created, you can create as many devices as needed using this model.
To correctly process device data, it will be necessary, as part of the model configuration, to specify at least a script to define the device structure, and a script to process data received from the LoRaWAN network (payload).
Creating the Device in Gear Studio
Finally, the device can be installed by following these steps:
- Navigate to the device management screen.
- Click the "Add" button.
- Enter a description for the new device.
- Select the model from the dropdown list.
- Enter the communication interface.
- Enter the unique device identifier (DevEUI).
- Click "Save".
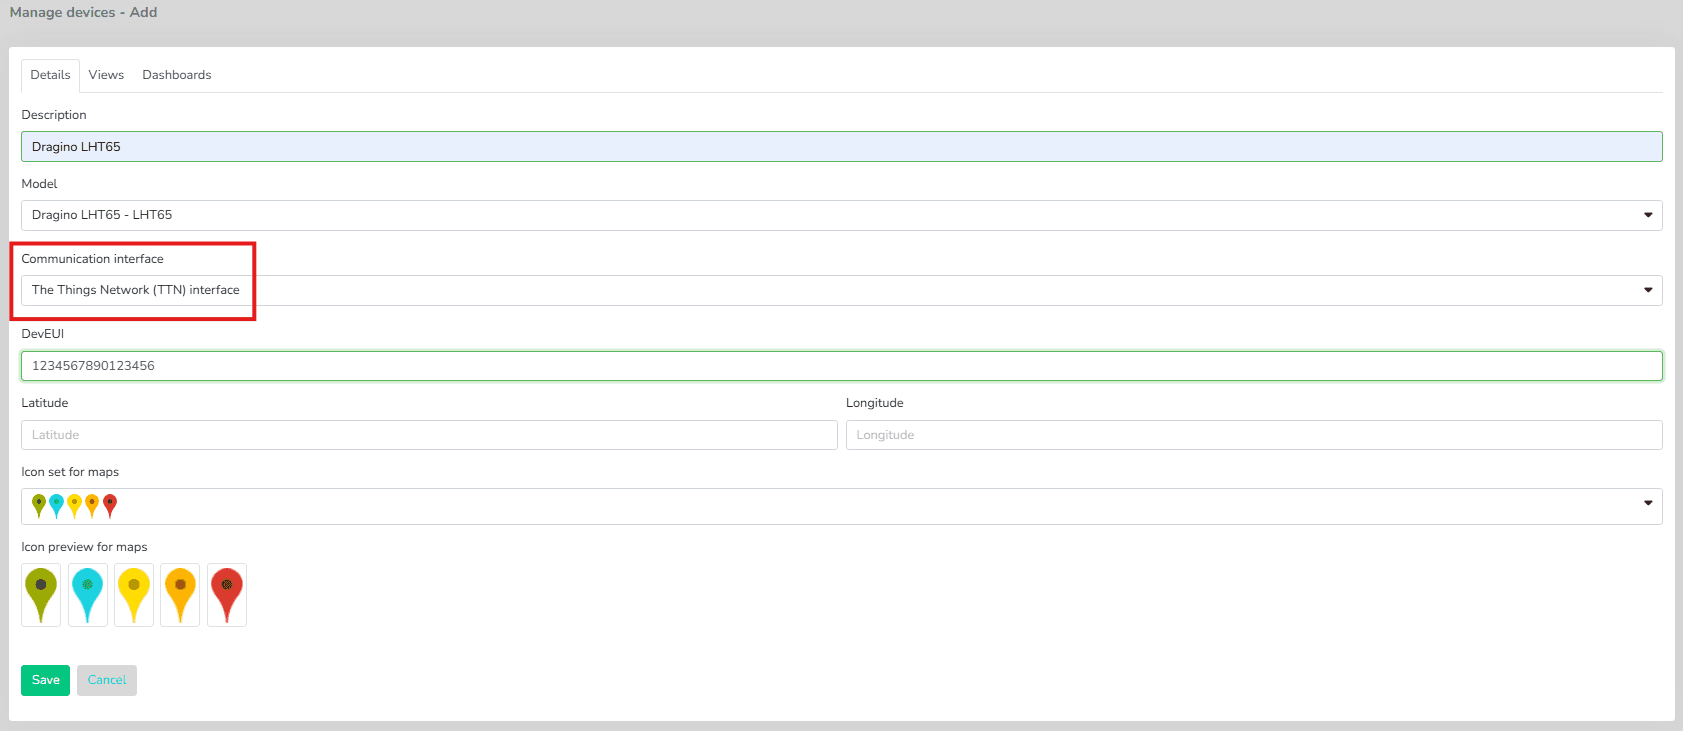
At this point, the device will be ready and will start receiving data immediately. Optionally, you can review the configuration of each device endpoint if necessary.
Last updated on
LoRaWAN Network Servers (LNS)
This section details the integration processes with different LoRaWAN Network Servers.
ThingPark X IoT Flow (Actility)
The ThingPark X IoT Flow integration allows the Cloud Studio IoT Platform to communicate with LoRaWAN devices using a variety of gateways available on the market. This article describes the steps necessary to complete the integration.